TL;DR: Cloudfront + S3 + Route53 -> Netlify DNS
I like new things. AWS has an endless amount of cool things in its services, but site hosting in buckets just doesn't have that "shiny" new feel. My CI/CD process consisted of pushing local changes to github and running npm run build && npm run deploy in my terminal. I wanted more... and a robust pipeline would take a bit of groundwork to get up and running. This seemed a good enough excuse to try Netlify - which offers a pipeline and much more pre-configured for free!
Getting on Netlify
I chose to follow the New site from Git track to quickly get a version of my site deployed. After signing up and a few clicks, Netlify was aware of my site and watching with a configured build pipeline. To get my Gatsby site to deploy, I only had to update the build command the pipeline would use. To do this, I added netlify.toml to the root of my directory containing the following:
[build]
  publish = "public"
  command = "npm run build"
[build.environment]
  YARN_VERSION = "1.7.0"
Netlify then kicked off the build (since I had committed the file to master) and my site was live at http://s11a.netlify.com. CI/CD with no effort is the best kind!
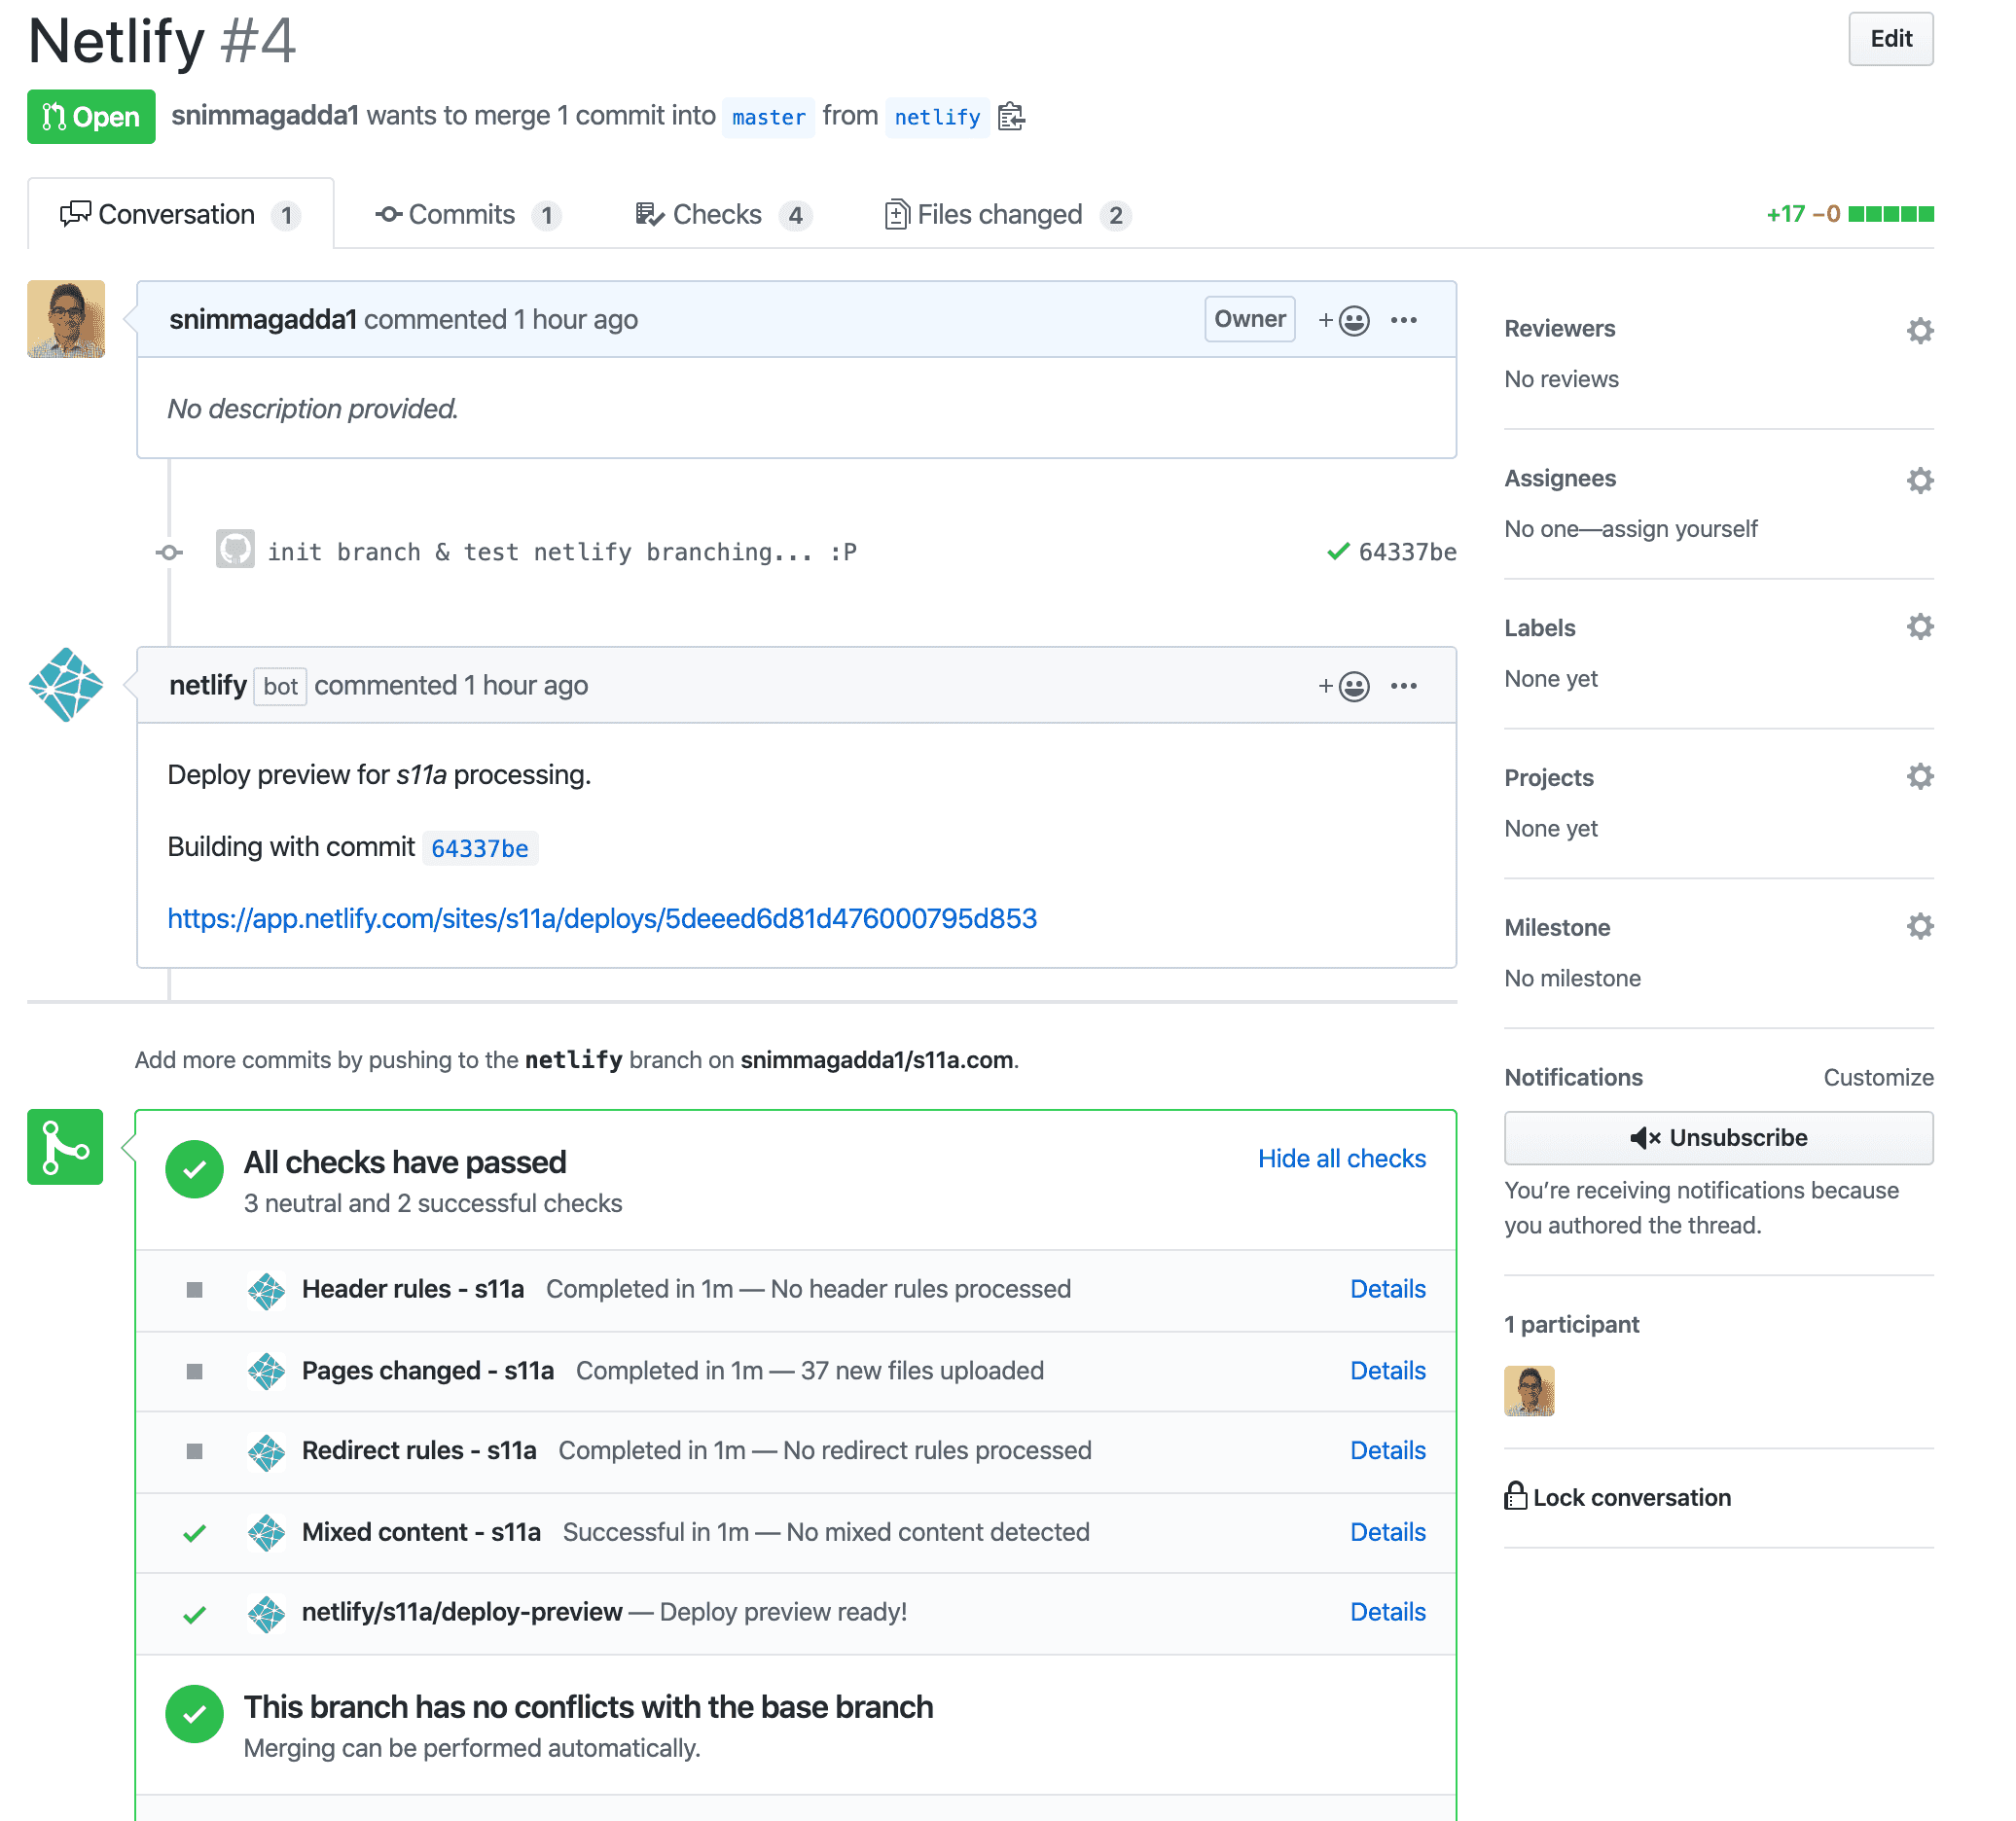
Peeking at Netlify's settings, I saw it had some Git integrations enabled by default. I immediately enabled them all and created a PR to test. Deploy comment's and checks! Ooh ahh CI/CD:
Next I wanted to have Netlify host my site at my custom domain. After taking down my Cloudfront deployment and S3 buckets, it was time to transfer my DNS.
Route53 -> Netlify DNS
I think parts of Netlify's docs are a perfect example of when minimal is too minimal, but their migration docs do a decent enough job explaining the process for a number of migration methods. In my case, I wanted to keep AWS as my registrar but use Netlify's DNS service. From reading some of their suggested migration strategies, this seemed the easiest way to get started hosting.
I started with Netlify DNS (still in beta), so there was really only a few steps to get the site up at a custom domain:
- Add the domain to Netlify
- Update AWS Route53 hosted zone (NS, SOA)
- Update the domain's name services (if controlled by AWS)
Adding the domain to Netlify
The Domains section of Netlify has a wizard for adding a domain. Using it is pretty straightforward. Notably, in step 2 I had to make sure to transfer all important DNS records from my hosted zone in Route53 to avoid downtime (i.e email, subdomains).
Update the Route53 hosted zone (NS, SOA)
After the wizard was finished, I was presented with four of Netlify's nameservers. At this point it was time to transfer control of my domain's DNS to Netlify. In the Route53 console I performed the following steps to change my domain's DNS to Netlify DNS created in step 1:
- Replaced the existing NS value with the four Netlify hostnames
- Updated the SOA record:
- Changed the "authority-domain" value to the first DNS server Netlify listed:
dns1.p08.nsone.net. - Changed the "hostmaster-email-address" value to
hostmaster@nsone.net. - left the remaining values as is and clicked "Save Record Set"
- Changed the "authority-domain" value to the first DNS server Netlify listed:
Since AWS was my registrar, I had to update my domain's DNS. I navigated to Route53 -> Registered domains -> MY-DOMAIN.com ->Add or edit name servers and set the value to the four Netlify name servers from step 1.
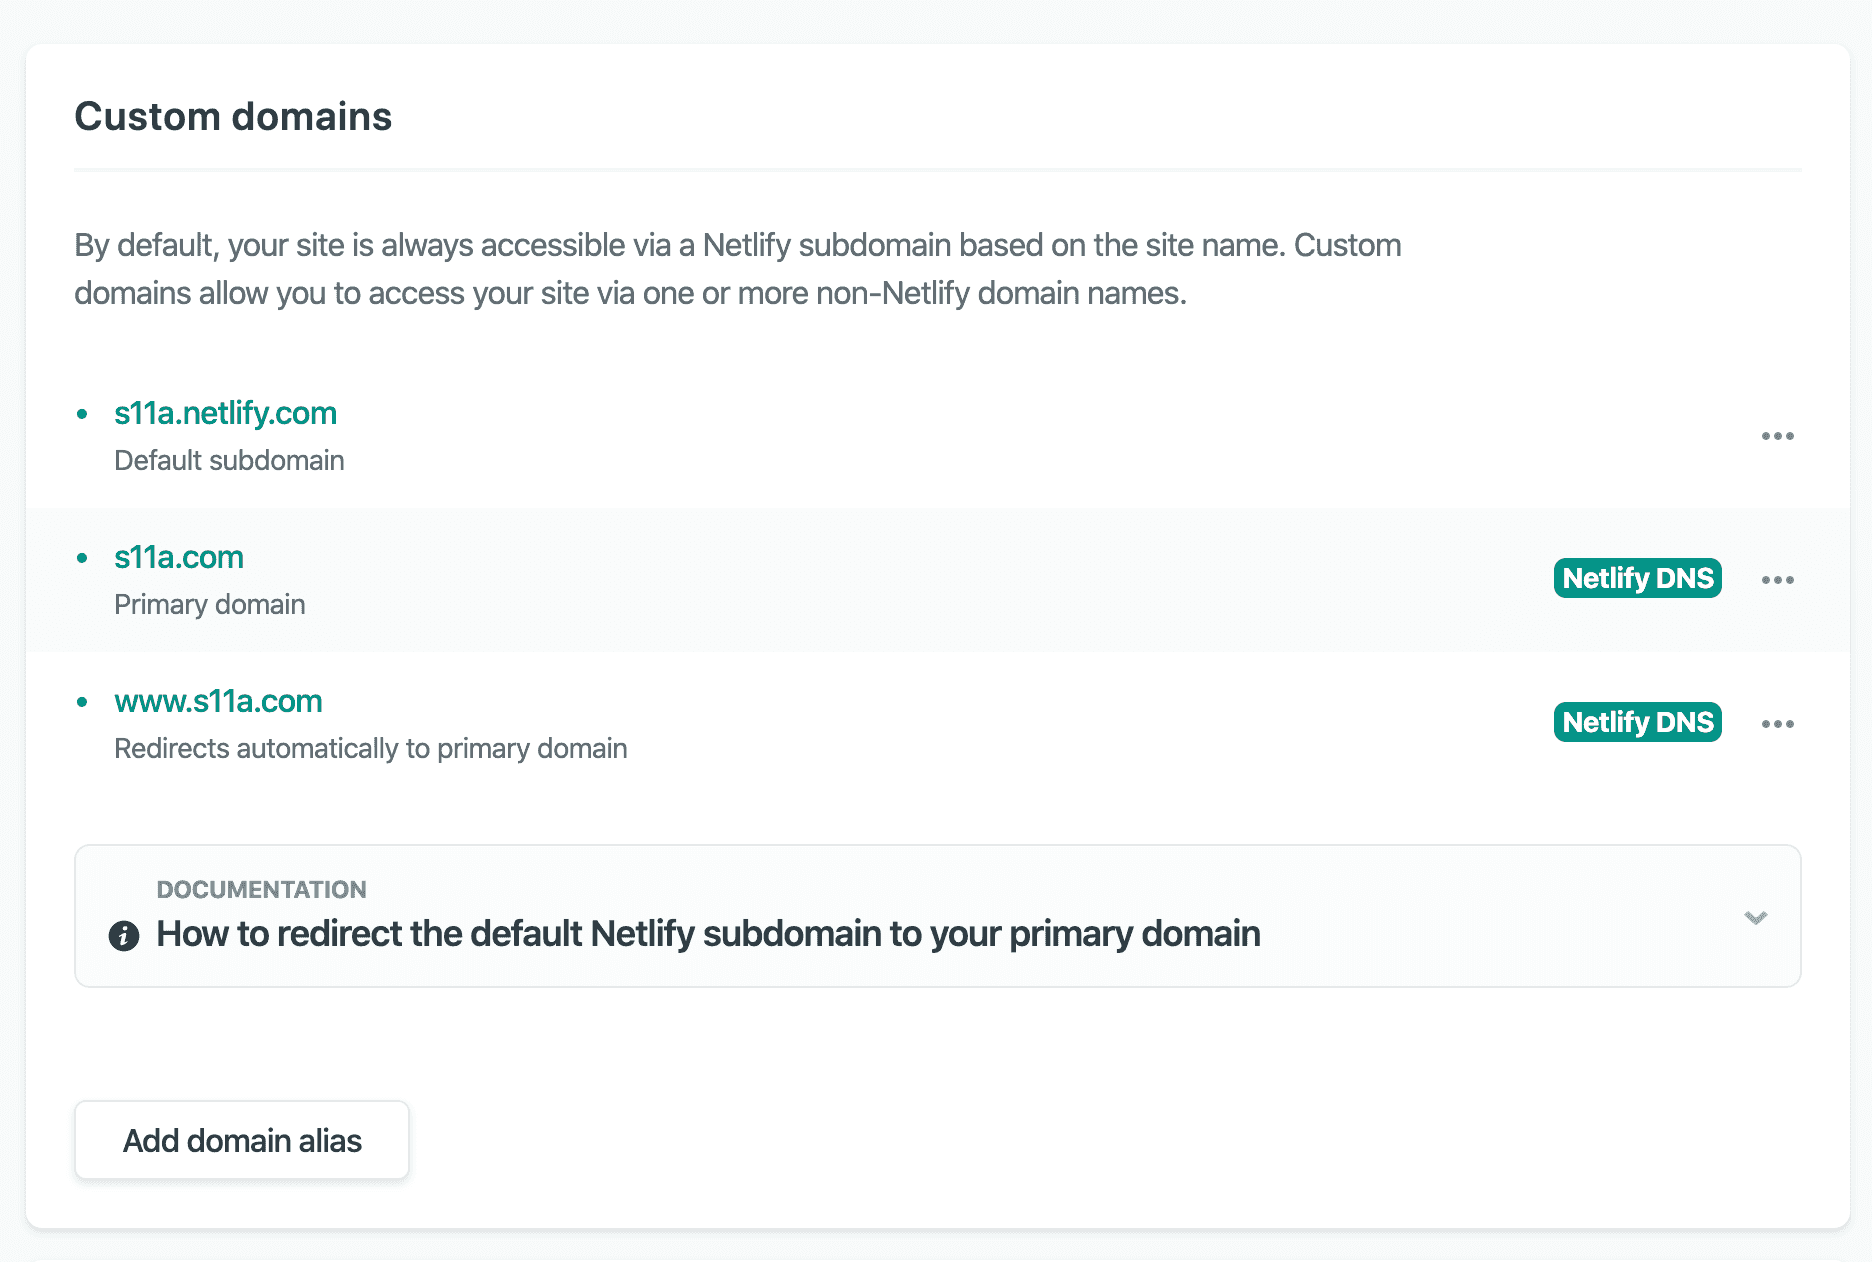
Adding the custom domain to my site
After switching around the Route53 configuration, I had an externally registered domain associated with my Netlify account. The final step was to add this domain to my site. In the "Domain settings" panel I chose s11a.com as the primary domain and Netlify automatically configured www.s11a.com to redirect to it.
The final step was to enable HTTPS via Let's Encrypt on Netlify. In order to do this, I had to wait for DNS propagation and verification to finish on Netlify's end. I found this step to be a bit glitchy in Netlify's UI, as it would switch back and forth between a verified and unverified state. I waited a while and flushed my DNS cache and was finally able to provision a cert:

And that's it, my site is now live and secured along with all of Netlify's features!